
SO HOW EXACTLY IS DGMAG PUT TOGETHER?
AND DO YOU WANT TO KNOW?...
Hello readers. As you may be aware, making comic books is not easy and when it's only up to one person and some spellcheckers, it can get pretty hard work...
The DGmag is made using Microsoft PowerPoint and only the shapes, clip art and colour help to build up the main structure of your twelve paged comic.
The hand drawn comic strips are scanned in and begin in black and white. I prefer to use pens such as Berol to draw with as the ink stands out well when seen in the final completed strip. Felt tip pens are used in the logo of the strips.
I change the contrast and saturation in PowerPoint to begin with as the strip looks faded otherwise. The comic strip is then saved as a jpeg in a folder called "Hand Drawn Strips". A jpeg is a fancy word commonly known as a picture.
Step One: Scanning the hand drawn strips
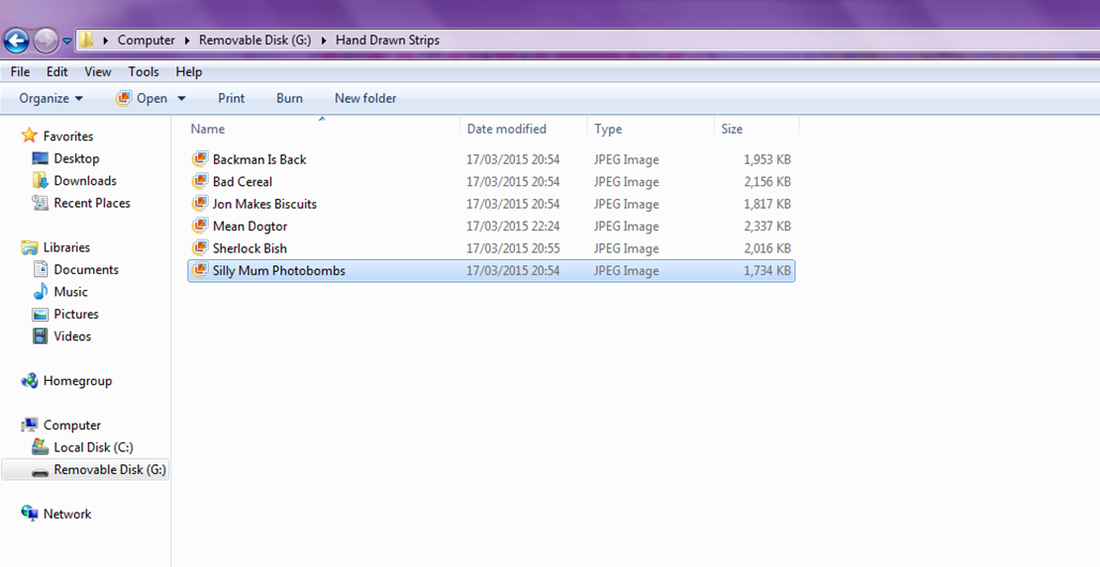
As you can see, the strips for the issue "Tragic Magic" (see issue to know what I mean) are shown in alphabetical order. The highlighted image is the one in which I was working on - "Silly Mum Photobombs". When the image is being worked on in Photoshop, the image name may be changed as it is to be saved as a jpeg and not a scan.
Now is when the fun begins... The image ended up titled "Photobombing mother mayhem". I mean, it states what it is. Enough said...
Now is when the fun begins... The image ended up titled "Photobombing mother mayhem". I mean, it states what it is. Enough said...
Step two: Photoshop editing
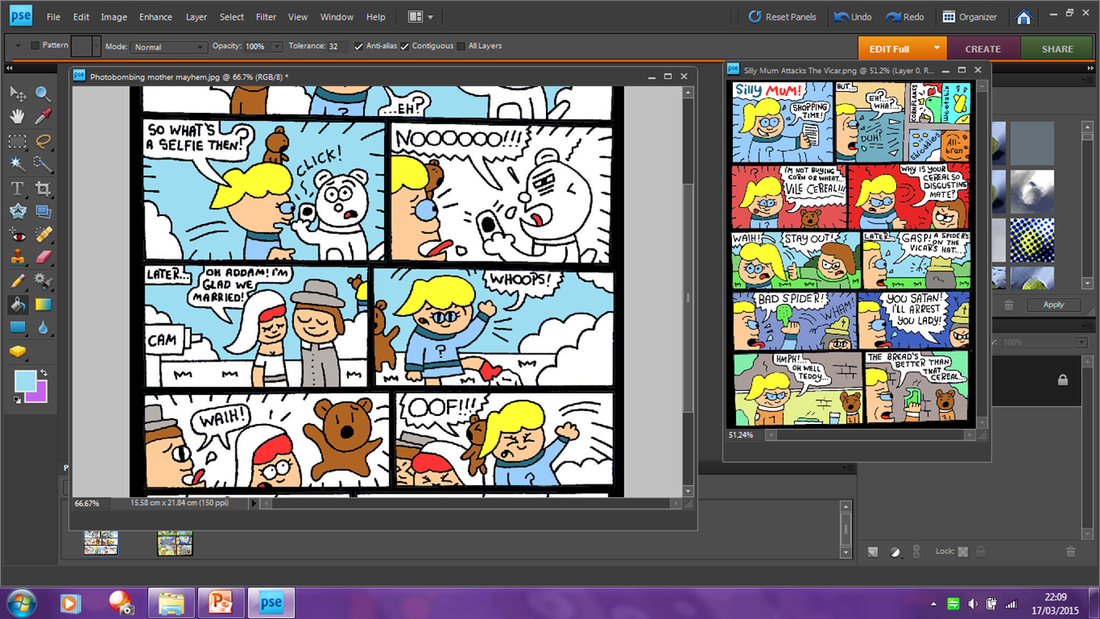
I used the template from the last Silly Mum as the colours were what I wanted to use. The paint bucket tool allows you to highlight areas of colour which you want. Notice that colour is still to be added and that I mainly work on Silly Mum and Teddy first as they are my main priority characters.
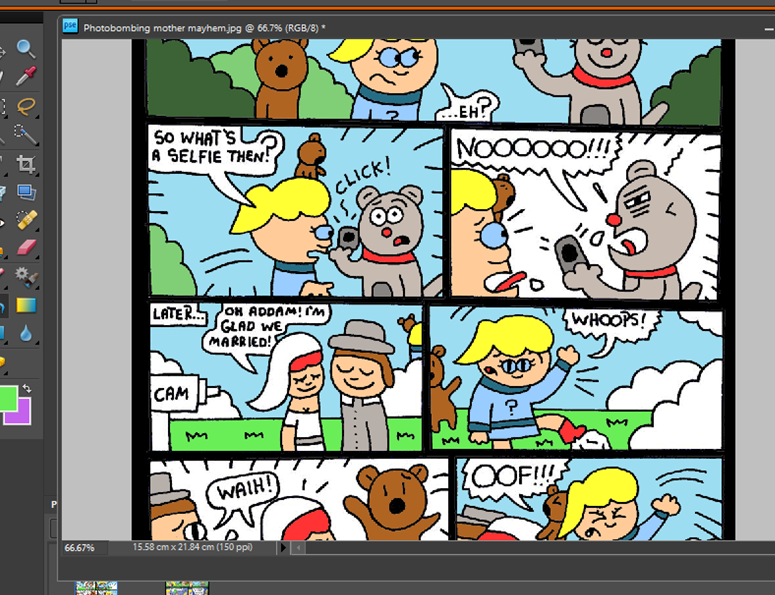
The colour has really started to kick in by now. All that's left is some backgrounds, hedges and objects and it shall be done.
Step three: Making the DGmag itself
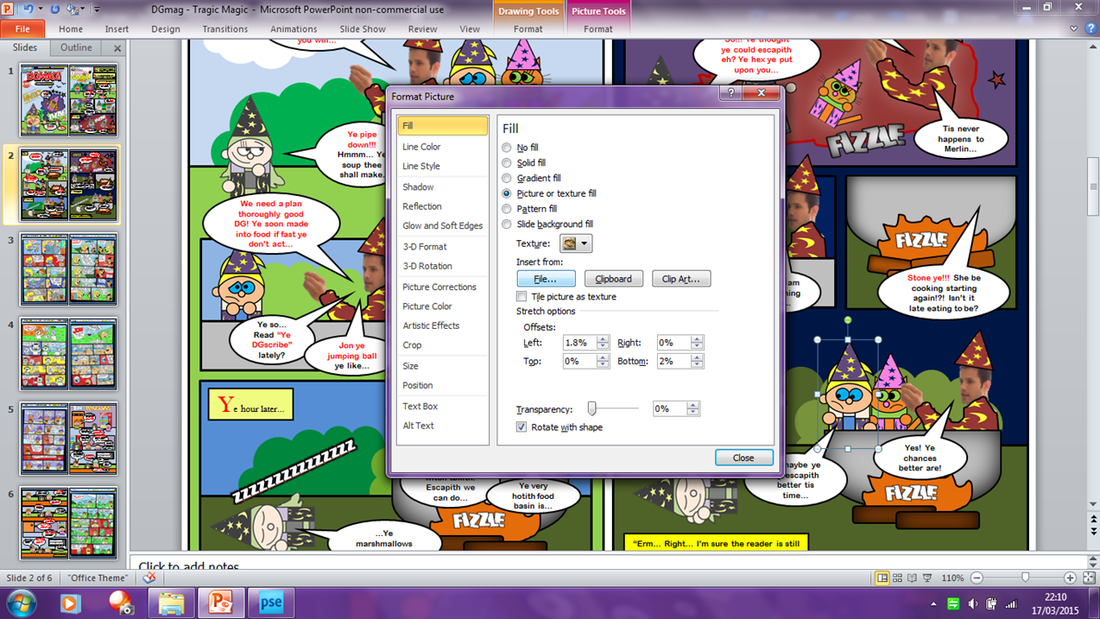
The characters are all individually made using templates of coloured shapes in PowerPoint. The character is then saved as a jpeg and inserted into a picture that I can edit once in the issue's template. Notice that Dom has just been changed and is highlighted as a "Picture or Texture fill". This means the original shape was filled with the image of Dom and the outline of the square box I used was also removed. Otherwise Dom would have a strange square force field around him. And we wouldn't want that now. (I now just copy the image and use "Paste Special" as this is easier.)
Wasn't that interesting? Now you know how some of the DGmag is put together and made. The comic uses the previous issue's template as the recent revamping is kept throughout the issues. This issue used the template from "Mean Lean Trampoline".
UPDATE: As of Chaotic Halloween - The magazine is still made the same way yet I now use GIMP 2 studio instead of Photoshop and a smoother to run version of PowerPoint.
See you later.
Dominic Davis
